Question for you, how are you going to work the ground? Are you setting up a slip ring? You don't want to flow the ground through the headstock bearings.
Kevin
[quote="n7gxz"]Question for you, how are you going to work the ground? Are you setting up a slip ring? You don't want to flow the ground through the headstock bearings.
Kevin[/quote]
Good point, I hadn't really thought about that but I definetly don't want the ground going thru any bearings... It's not going to turn very fast, one revolution in 4 to 5 minutes, and the duty cycle on my welder is probably going to require me to stop for a couple minutes after each revolution... Maybe just let the ground wind around the tail stock one time and then fix it while the welder is cooling?
Sent an email to Lincoln this morning to find out what wire they suggested for this job, got an automated answer a few minutes later, it said they would have a tech try to answer my question within two days. Well I'm not very patient so I called their main office and asked if there was someone who could help me pick a mig wire for a specific application, they connected me to a tech that suggested Lincore 55-G as long as I didn't go over 3/4" thick so I ordered some from weldingsupplies.com...... Just checked my email, and there was one from a Lincoln applications engineer and he said to use Lincore 33 ?? So much for a final answer.
Guess I'm gonna stay with the Lincore 55-G unless someone tells me they tried it and it didn't work.

hi reclineaholic, you may want to invest in making a waterbath and a set of rollers so that you can build up the rollers without the need to
fully dissasemble them.
i used a lincoln 400 amp to do the job and just standard MS copper coated wire. yes i am sure its not ideal but i was at the end of my tether with money and figured well bugger it, I'll give it a go.
i have done about 40 hours now and cannot see the slightest bit of wear on the rollers.
ditto on welding in the lathe, though you would be able to make up a set of polyethylene soft jaws to grip the roller and effectively isolate the roller from the chuck if you wanted to.
i made a jig that would spin the roller at a constant speed while being in a water bath out of bits and pieces round the house. if you have a lathe you would be able to do the same.
my guess would be that the best rpms were about 0.7-.9 rpm for a roller that is approximately 200mm in diameter.
for earthing, i used a 15 dollar magnetic earth clamp, with a c shaped bracket i would tack welded to each roller to allow for a flat surface. worked well.
i used a windscreen wiper motor to drive one roller while the other was simply a free spinning roller.
the best beads were laid with the roller rotating away from the gun, with the gun pointing uphill, and zig zagging about a 15mm wide bead along the length of the roller. i canpretty much guaruntee you are going to be working at at least 200 amps as you need the heat to evaporate the water off otherwise the weld will sputter. i am pretty sure i was welding at around the 270-300 amp range
took a bit of learning to work out the best way, so be ready for a couple of days welding. holding the welder still and doing single line beads was pretty messy in the end, but give it a go and see what works best for you.
as with everything,theres always more then one right way.
hope this helps. : )

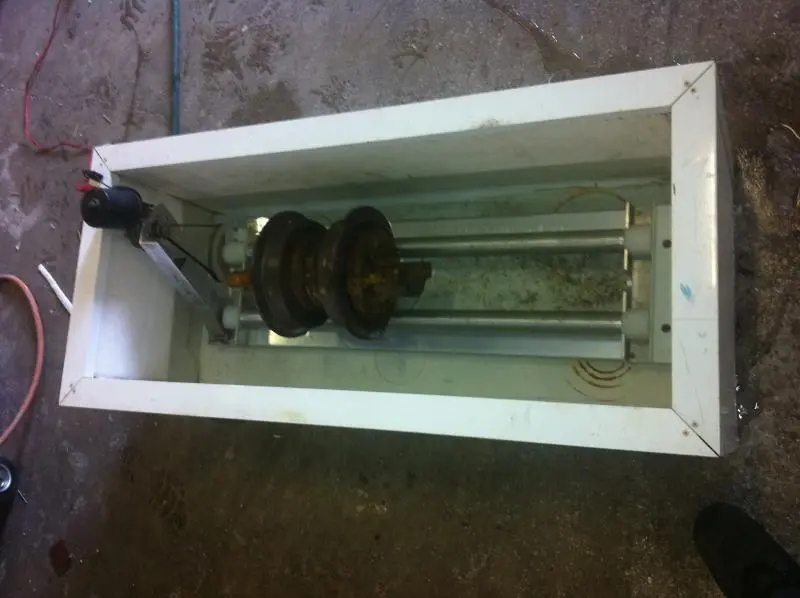
Just a follow up in case anyone else is looking for something to weld up rollers.
The Lincore 55-G hardface mig wire came yesterday and I got one of the rollers welded up with it. It was very user friendly, I just set the voltage and wire feed speed per the spec sheet and once I got the lathe speed dialed in the welds looked pretty good, they are wide, flat and smooth. There's quite a bit of splatter but don't think that will cause any problems.
[attachment=16171]2013-02-08 16.50.01.jpg[/attachment][attachment=16172]2013-02-08 20.13.56.jpg[/attachment]
Nice!
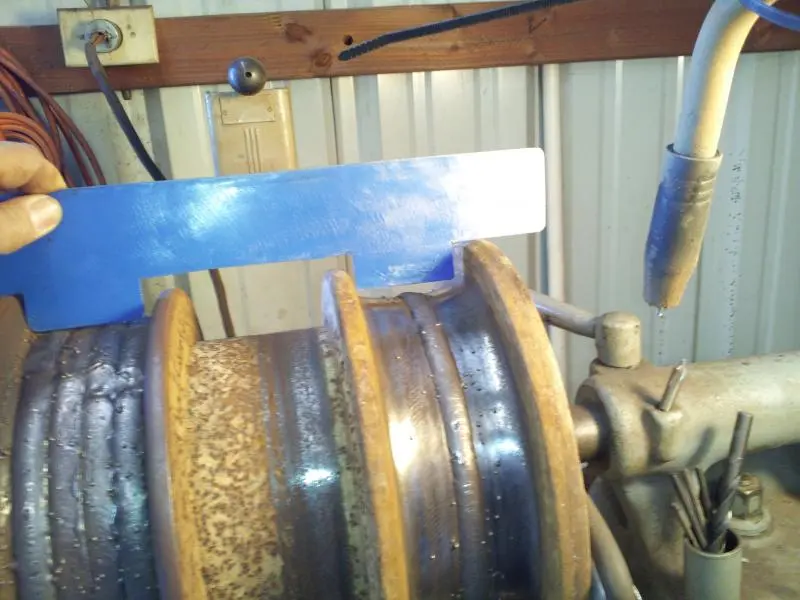
Have you checked the bores to see if you have any distortion?
I'm not sure, but the 2nd weld looks to be flatter than the 1st?
Either way, nice job!
G'day. When I was an apprentice in a Cat dealer in the early 80's they had the old rebuild equipment that used what is called submerged arc which used a mig type wire and a powder flux running out of a hopper and totally sheilding the arc as the idler was turning very slowly, an operator stood there and chipped of some of the flux that hardened over the weld and monitored progress and adjusted. When the job was done the idler would be covered up to cool slowly, the idler was pre heated with oxy before welding started to manage distortion and I think the later hollow type idlers would need a small hole put in the side of them. I only ever saw a couple sets of rollers done because of cost I think but distortion and bearing retention was a potential problem. I think the consumables where lincoln products. The equipment was quite old then.
Kevin
[quote="ccjersey"]Nice!
Have you checked the bores to see if you have any distortion?[/quote]
The roller pictured needed to be built up 3/8" and had .020" shrinkage on one end and .015" on the other, it had to be bored before reassembly. I just finished another roller that only required 1/4" build up and it only shrunk about .001" I honed it with a cylinder hone and it reassembled with out a problem.
[quote="drujinin"]I'm not sure, but the 2nd weld looks to be flatter than the 1st?
Either way, nice job![/quote]
It is flatter. Thought I was getting better with practise but I've done two more and the second weld is still the best of the four so it was just lucky I guess. lol


Our channel highlights machines from the earliest Holt and Best track-type tractors, equipment from the start of Caterpillar in 1925, up to units built in the mid-1960s.
Chapter Two
| Highacres Farm, Dewey Lane, Brackenfield, Derbyshire DE55 6DB, UKChapter Nineteen
| 2 Winkleigh Rd, Exeter TAS 7275
Antique Caterpillar
Machinery Owners Club
1115 Madison St NE # 1117
Salem, OR 97301
Terms & Privacy
Website developed by
AdCo
"I also joined a year ago. had been on here a couple of times as a non-member and found the info very helpful so I got a one year subscription (not very expensive at all) to try it out. I really like all the resources on here so I just got a three year. I think its a very small price for what you can get out of this site."
-Jason N